Friday, October 3, 2014

World Card Making Day Blog Hop with My Scraps & More Sketches!!!

Hello and welcome to the My Scraps & More Sketch Blog blog hop!!  Today, each design team member has created a CARD sketch to celebrate World Card Making Day.  That’s TEN different sketches!!!


There will be TWO prizes given out for the blog hop:

1. One person will win a $10 gift certificate to the store just for commenting on one of the designers blog posts. I will choose one of the DT members blogs and then choose a random commentor from that post.

2. Another winner will be chosen from all the card sketch entries uploaded to the In Linkz on the My Scraps & More Sketch Blog. For each card sketch, create a DIFFERENT link up. So if you complete all 10 sketches, you will need to do 10 link-ups! (On your card link please be sure to mention whose sketch you used and link back to the My Scraps & More Sketch blog. If you’d like you can also leave the DT member a comment with a link to your card so they can see what you did with their sketch.)

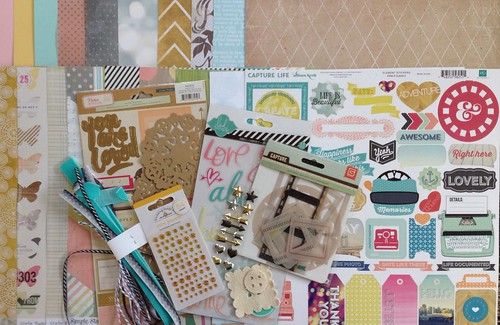
Here is the prize for the card sketch blog hop:


Untitled

All comments and card sketches for the Blog Hop must be linked up by Monday, October 6th at 12 pm EST.

BUT, if you don’t complete all the card sketches by Monday, that’s OK….you can still upload them through the end of the month for the monthly prize drawing on the sketch blog!  The more sketches you do, the more chances you have to win!

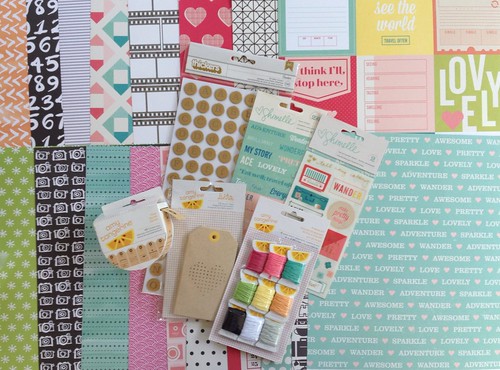
Here is the monthly blog prize:

Untitled


And now let me share my sketch and card with you:

I decided to do something a little different with the sketch and I created a CIRCLE shaped card!  I love making cards of different shapes...it's a quick way to add some charm and personality to a card.  And you can embellish it very simply, and it will still look spectacular!

Here is the sketch:


I just some stickers and die cuts from Fancy Pants Merry Little Christmas, and then added a few sequins.  Sequins seriously make EVERYTHING look fancier, and it is such a simple touch that adds a big impact.


If you are scared about doing a round card, just look at the sketch as a circle on a square or rectangle instead.


Since I was using the Fancy Pants stash, I decided to make a few more cards based on some of the other DT members sketches! Now, I'm not gonna share their sketches, but I WILL tell you whose sketch it was!

Michelle's


Missy's


Tracy F's


and another card just because I wanted to!  :)


To see all the other sketches, check out the other DT members blogs below:


Thanks for hopping along with us!

Wednesday, October 1, 2014

Guest Designer for AMERICAN CRAFTS!

I am so thrilled and just EXCITED to have been asked to be a guest designer again for American Crafts!  (I was a GD back in 2011...I look at my old stuff and cringe a little!  Ha!).  If you know me or have been following my blog, you know that I have always LOVED AC products.

I was assigned the theme of scrapping in 30 minutes or less.


EXCUSE ME?????  Um, are you KIDDING?  I usually spend 2-3 hours on a page, easy.  I'm a slow scrapper.  Although it probably doesn't help that I procrastinate a lot while scrapping...checking FB and Pinterest, etc.

Since I have been in a little bit of a rut lately, I decided that this was the perfect thing to get me out.  So my approach was this: spend time PLANNING so when I actually sat down to scrap, then I only worked 30 minutes.  To do this, I thought first about the photos I wanted to work with to go along with the LOVELY Shimelle and Amy Tan Plus One papers.

Once I had those picked out, I thought a few days about how I would use the products I was given and how to layout my page.  I spent a lot of time just *thinking* during the day.  I drew a simple sketch in my notebook when I had a vision in mind.  Then, I finally sat down to scrap.  I quickly picked out papers, and mostly focused on using the Die Cuts and Stickers for embellishments.

For my first page, I simply took out the number die cuts (and  few others from the pack) and placed them in rows.  There was also a "3" sticker in the sticker book, so I just popped that off a punched piece of paper to emphasize it.  Then just a cluster of embellies on the bottom left, and some fussy cut circles on the top right.


The key to this page was using a background paper that already had somewhat of a layout design on it...the blue strip on the left is already on the background.

For my 2nd page, again I focused on using die cuts and minimal papers.  I just added a few strips of paper to the bottom and layered some die cuts behind the photos.  Also, I find that using a grid design is a great time saver and is easily embellished.


Finally, my last page was heavy on the planning, and when I sat down to do it, it went really quickly!  My photo was about my quilts that I've made, so I knew I wanted to use a "quilted" background. I cut squares from several papers, and then cut some of them on the diagonal to create my background stars.


Then I tried something that I have never done before: free motion stitching on paper!!  If you don't know what free motion stitching is, basically, you lower your feed dogs and have to move the paper around under your needle.  Think of your needle as a pen and you "draw" with the thread.

After that, I just added the photo with some vellum and again a few stickers and die cuts.  Easy peasy!


My card was also pretty quick to make.  Just some strips of paper cut into long, thin triangles, stitched down the middle, and then the center covered with a die cut.


Finally, an altered project.  In 30 minutes.  This was a tough one, so I decided to just keep it simple.  I had a package of the Shimelle wood veneers right in front of me, and I knew I wanted to use them.  So I came up with the simple plan of adding some paper to the back, coloring in the fronts with some markers and gel pens, and covering with Mod Podge.

Once dry, I punched a hole and added them to my keychain!!  A simple keychain charm!  I was thinking that adding some initials to the heart piece would be so cute!


WOW....all I can say is that this experience really helped me get out of my rut!  I am so thankful on many levels!!

Monday, August 4, 2014

Feliz Cumpleanos!

As I was deciding which photos to use with this months Scrapbook Circle kit, Island Paradise, I remembered that last year I created a birthday page (or two!) with a Scrapbook Circle kit when Kyler turned 2!


2 SBC

SO, I decided to do a "Take 2" and lift myself to create another birthday page, this time of course, for birthday #3!  All he wanted for his birthday was a Dora cake, so that's what he got!  We had a Mexican themed party and it was so much fun!

   feliz cumpleanos SBC


 I started by printing a large photo and cutting out the Basic Grey paper to make the banner pieces.  I stitched them down with some black and white twine.  I had a banner in my photo, so I used the same piece of paper from the 6x6 pack in the add on to add smaller banner paper pieces to the actual banner in my photo. I added a title card and punched a circle from a journaling card to the left of my photo.

 Feliz-cumpleanos-3   


 For my title, the chipboard letters were a bit too long when layered side by side, so I stacked them in a staggered fashion and it worked out great, plus added some interest to the title!


    Feliz-cumpleanos-2

 Finally, I added some of the wood sequins that I covered with some loose glitter!

   Feliz cumpleanos 1

Thanks for stopping by and stay scrappy my friends!  

Friday, August 1, 2014

Scrapbook Circle Blog Hop with Page Maps!

Welcome to our Scrapbook Circle Blog Hop! Scrapbook Circle has a new creative team, as well as a fabulous August kit, and we'd like to introduce you to both. You could win one of FIVE August kits by commenting as you hop from blog to blog, meeting faces new and old to Scrapbook Circle. If you just left the lovely Valerie's blog, you are in the right place. If not, I hope you'll join us for the entire hop by starting at the Scrapbook Circle blog, here.

I have been a part of the Scrapbook Circle Team on and off again for 4 year long terms!  And in between those terms I have ALWAYS been a member, too!  I love working with scrapbook circle kits....they always have my favorite manufacturers and the perfect embellies to go with the papers!


I LOVE the bright bold colors in the August Kit "Island Paradise".  The Basic Grey papers from this collection were definitely on my must have list, and there are just a ton of embellies.  I got BOTH add ons this month, Bungalow and Tiki Torch.


NEW SUBSCRIBER DEAL:
And how about this for new subscribers:  If you start a subscrpition with the August kit, you get any in-stock past kit FOR FREE!!!

1. Add the August kit to the cart.
Link to August Kit:http://shop.scrapbookcircle.com/collections/featured/products/island-paradise
2. Select a past kit that you want for free.
Link to view all kits: http://shop.scrapbookcircle.com/collections/kits
3. Use code FREEKIT in the promo box.

Scrapbook Circle also teamed up with PageMaps this month, and I used this awesome sketch by Becky for my page.  Be sure to check out all the other fabulous August sketches!


And here is my take on the sketch!  So there's this bench near our summer camp, that I think it probably just for show.  But for some reason, it just calls to my kids to "come sit on me".  And they actually sit so I can take photos!


I loved the lines on the right side of the sketch, so I began by stitching some on my page with orange thread.  I stuck fairly closely to the design of the sketch, but added in some circle elements to add some movement across the page.  I added the chipboard frame over the photo much like the frame in the sketch, but I rotated it to add some more interest and because I had a lot of negative space in my photo.


The heart circle is actually from the exclusive SBC stickers in the kit, which are square, but I punched it out with a circle punch.


Thanks for hopping along with us today!  A reminder that FIVE lucky commentors will win a few kit.  Hop along to each blog and leave a comment!  Comments close at midnight EST on Monday.

You are now on your way to the talented (and my IRL friend!) Sara Zenger!

And in case you need it, here is the entire hop order!

Scrapbook Circle Blog: http://www.scrapbookcircle.com/2014/08/scrapbook-circle-blog-hop-pagemaps


Stay scrappy my friends!


Friday, June 27, 2014

Scrapping Your Stash Monthly Blog Hop: 5 & Happy!

Welcome to the Practical Scrappers "Scrapping Our Stash" monthly blog hop!   On the last Friday of each month, a group of us share a project with older stash that we haven't used in a while.  Hop along the blog list below to see a ton of great projects making the "old", NEW again!

My daughter just turned 5 a few weeks ago and we threw a tea party for her and her friends!  The girls each got a hat that they decorated with feathers and flowers and they each got a tea cup and saucer to take home, too (thank you Salvation Army!).

For her invites, I found a tea cup card cut file (see more details below) and used some old Basic Grey "Sweet Threads" paper for pattern (these are at least 2-3 years old!).  As I was going through the papers, I realized how much I loved them, so I decided to bring them back for this page as well.


I was inspired by a quick little tutorial I saw at ScrapMuch? by Laura.  You simply cut a scalloped punched piece at the highest points instead of the valleys.  Anyways, I cut all these pieces out from lots of different patterns and created a "wreath" like pattern on the background.  Before I glued the papers down, I stitched concentric circles around the page, put the papers down, and stitched a circle around them, as well.  Then I outlined some of the punched shapes with a thin black pen to make them stand out a bit more.


There are a few mist splatters on the background and some chipboard pieces also from the Sweet Thread collection. You can also faintly see some polka dots that I lightly stamped with a black ink.

I wanted to make this page really look frilly, so I used some pearls (along with the frilly punch to create the wreath pieces), pink, and flowers.  What's more girly than that? :)


The #5 was cut with my Cameo and the "Happy" was a sticker from the collection, too!


Continue on the hop below to see MORE inspiring projects!

Audrey http://audreysreflection.blogspot.com/  <-----YOU ARE HERE!

Stay scrappy my friends!

-Audrey


Monday, June 23, 2014

Almost 5!

If you have followed my blog for a long time, you may remember that every year around Charlotte's Birthday I do an "Almost _" layout, lifting the design of the page every year.  So here is this year's installment of an "Almost _" layout: Almost 5!


I was inspired by a color combo at Color Me Scrappy.  The green of my daughters shirt was perfect for this combo.  I don't usually use such a bold color for background, but I loved this ombre paper from Glitz "Finnley" and the shade of green was a great match!


I was browsing through some cut files in the Silhouette store and loved this one (cut out of white cardstock). I backed some of the open spaces with patterned paper (Crate Paper Styleboard) and gold vellum (MME Necessities).  Then I stitched around the circle with pink thread.


I fussy cut a LOT of flowers from some MME "Now & Then Mildred" paper, and used some other die cut and vellum flowers (Crate Paper MH Styleboard).


A few other stickers and vellum bits here and there on the page.


Just for fun, here are the other 4 layouts from the past years!


Thanks for stopping by!  Stay Scrappy My Friends!


Monday, June 16, 2014

Bright Beginnings!

Charlotte had her preschool graduation a few weeks ago.  Where does the time go?  She LOVED her school and her teachers.  Part of the logo for their school is a sunburst, so when I saw the 6/8 sketch a Studio Calico, I was inspired to create a sunburst on my page.


And then I also saw the colors of the recent mood board at Scrap Around the World.  I thought the yellow and black would be perfect for this page!  The diagonal lines in the straws inspired me to use the yellow lined paper from the Crate Paper Boys Rule collection for my "sunburst".


I started by cutting random "rays" for the sunburst and then stitching them down on the page.  The I dug out a lot of black accents, including wood veneer stars that I inked black, and some die cuts and chipboard from Crate Paper Styleboard and more Boys rule.


Of course I had to add some black splatters and for a little bit of subtle color, I added a few light mint colored vellum stars from Boys Rule.


I am SOO happy I am coming out of my scrappy rut!  More to come this week!

Stay scrappy my friends!

Friday, June 13, 2014

Color challenges.....

I've been in a bit of a scrappy rut lately, but I'm beginning to pull myself out thanks to a few color challenges I've been scoping out.

I always checking out kreative koncepts for their color and sketch challenges.  When I saw the colors this month, I started pulling out some papers from the new Studio Calico South of Market and Crate Paper Open Road collections.


Charlotte love love LOVES her Boppy. She calls him her "favorite friend". The other day she told me  she loves him more than me, but just a teeny, tiny bit!

I actually had to measure the triangles to cut them so they'd fit right (I usually just eyeball my cuts and cut with scissors).  Then I splattered some ink on the background.  I added a piece of vellum behind the photo and some journaling cards from Open Road.  Some chipboard bits and a few fussy cut flowers and that's it!

Finally getting out of a rut and it feels great!

Stay scrappy my friends!

Tuesday, June 10, 2014

Scrapbook Circle Projects-May

Has it really been THAT long since I blogged?  Why look....yes it has!

May was a super crazy month.  I went to a crop May 3rd, and that day I got super sick (a day after my daughter got it). I had a fever for 4 days, and for the next 10 days, someone in my house was sick.  It was tough.

Then it was Charlotte's 5th birthday on the 16th.  And we had TWO parties...one for friends and one for family (more to come on that!).

THEN, I had a super big show as a vendor for My Scraps & More at a small trade show event.  It was a LOT of planning and set up, but VERY awesome exposure for the store....I was even interviewed for a news segment!

So I am going to try and play catch up a bit this month.  And let me start by sharing my layouts with the May kit, "High Five", from Scrapbook Circle.   The May kit is still available in the store HERE.

So here are my pages and a bit about them:

I am so tired of listening to kids CD's in the car, so I have been playing the radio a lot.  The kids LOVE Hey Brother by Avicii because they say "Hey brother" and "hey sister" to each other.


I used a quote from the song as a subtitle and wrote my journaling around the edge.  Behind my photos, I used a sheet of paper from Heidi Swapp (Rainbow Rounds) and cut them to make frames.


I scattered some transparencies, sequins, and brads around the page, along with a few paint splatters.


Next I did this page for a challenge prompt on the SBC page: use hearts in your design.


I started by simply cutting out hearts free hand from different patterned papers and them arranging them on the page. Then I stitched over each one with a horizontal stitch.

 Charlotte's favorite color is orange, so I had to incorporate that a bit behind the photo.  I balanced out the placement of the color with other dies cuts and the title.


This next page is based on a sketch from the My Scraps & More Sketch blog, using a grid design.


On the squares where there were no photos, I layered some paper and embellishments.  There were so many extras in this kit like stickers, transparencies, die cuts, metal clips, stamps, and more!  I use them all!  :)


When I saw the sticker that said "Joy", I knew exactly what my title was going to be!


Here I did some stitching over the chevron stamp, and then added some small brads from my stash for the jouraling sticker.


Lastly, I played around with my Silhouette for this one, and I love how it came out.  Not the best photo of me, but it was the only one I had on my actual birthday, so I decided to use it!


I started by printing the numbers through the Silhouette software and set it so that only the 3 and 8 would cut out while the rest of the numbers were just printed.  Then I backed the 3 and 8 with paper.


 I added only a few simple embellishments for some color and to help draw your eyes across the page because I thought the numbers were a big focus for the page and didn't want to add too much else.


I'll be back with more....hopefully a lot more, for June!

Stay scrappy my friends!
  .